
Before you begin painting your wooden deck, there are several things to remember. This article outlines the process to effectively prepare your wood for painting. These steps cover protecting the post rails, sanding, and applying a poly sheeting layer to the rails and siding. After this, lay the poly sheeting beneath the deck. Ensure any nail heads sticking out and large splinters are removed before the stain is applied. Firmly secure deck screws. Use 80-grit sandpaper to sand all areas that will not be in the sun.
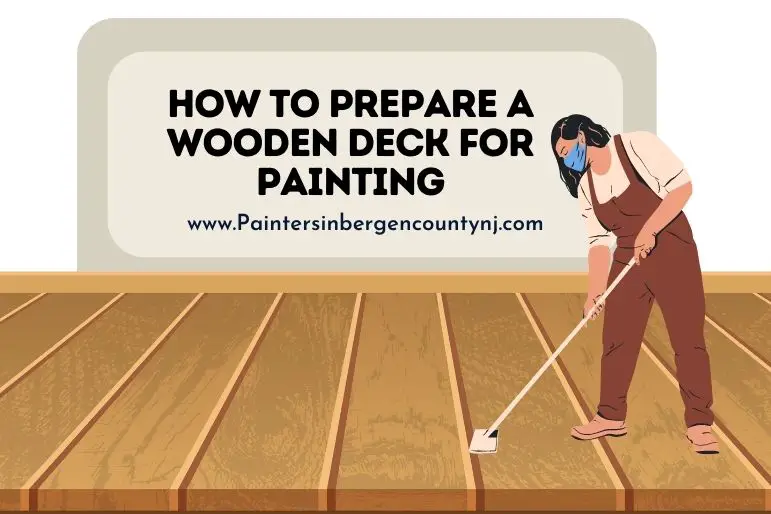
How To Prepare A Wooden Deck For Painting
If you’re planning to paint your wooden deck, you’ve probably heard that it’s difficult to get the job done right. While it is true that painting a deck is not easy, it does require a few preparation steps. Proper preparation ensures that your deck is ready for the paint, which will result in a better coating and more efficient paint use. And the end result will be a beautiful finished product.
Before painting your wooden deck, you’ll first need to remove any items that may be on it. Then, you’ll need to sand down the surface. While you’re sanding, remember to follow the grain of the wood to avoid leaving deep grooves or dents in the wood. Also, make sure to wipe the surfaces of your wooden deck thoroughly, including crevices in between planks. Also, remember to sand down banisters and spindles.
First, if your wooden deck is stained or has a hazy finish, you’ll need to sand the surface to remove flaking paint. Make sure to wear a professional-grade mask, as ingesting paint particles is not recommended. After sanding, you can paint your deck, but you’ll need to use large drop cloths to catch any leftover paint particles. Afterward, you can apply the new paint using a paintbrush.
Deck Stain
When you want to paint your deck, the first thing you should do is clean it thoroughly. You should rake away any loose debris and, if possible, use a broom to get rid of all dirt. Then, you should check for any rotting wood around the posts with an awl or screwdriver. Replace any rotting wood before staining it. Finally, make sure to attach the ledger to the house with lag screws.
If you don’t have a brush, you can use a hose to apply the cleaning solution to the deck. The best cleaner for this is a mixture of two ounces of soap and eight ounces of oxygen bleach. Mix this solution and apply it using a spray bottle. Oxygen bleach is safer than chlorine bleach, and it can be mixed with dish soap without any risk of creating toxic gasses.
Next, you should make sure the paint is in good condition. Pressure washing will help get rid of loose paint. Make sure to use large drop cloths to catch any paint chips. Apply a primer designed to change oil-based paint to water-based paint before painting. Once this is done, the deck is ready for painting. A fresh coat of paint can last for two to ten years, depending on the quality. The paint should also be applied in layers.
Loose Paint
If you are planning on repainting your wooden deck, you’ve probably wondered how to prepare it for the process. If you notice some paint peeling or loosening, it is crucial to remove it with a scraping tool or stiff brush. After removing the loose paint, lightly sand the surface to remove any remaining dirt or debris. The surface must be completely dry before painting.
In order to protect yourself from the toxins emitted by flaking paint, you should wear a mask. Make sure to protect your eyes, face, and clothes with a professional-grade mask. If you ingest any of the paint particles, contact your doctor immediately. To achieve a smooth and consistent surface texture, sanding is necessary. Once dry, the paint will look more even and professional.
To prepare a wooden deck for painting, remove loose paint and wood dust from it. You can use a wire brush to remove loose paint chips from the surface. Be sure not to overdo it, though, as this could lead to warping the wood. To prevent steam burns, wear protective clothing while sanding the deck. Alternatively, you can buy a paint scraper and paint spray.
Paint Roller
You may have heard of cutting in, which means laying a tapered brush along the edge of the deck. This technique helps you evenly apply the stain or paint. Do not force the roller down the deck boards or squeeze the material out of it. Instead, empty the roller cover before you begin. When you are ready to paint, dip an extension roller in the paint and roll it over the grid lines in the paint tray. This will help the roller apply the material evenly and completely.
If your wooden deck is made of rough wood, use a 3/4-inch or 3/8-inch paint roller. For medium-textured wood, use a 1/8-inch or foam roller. Use a paintbrush to touch up patches if the wood is smooth with little grain rise. A paintbrush will also help your deck look uniform. This way, you can be sure that the paint job is flawless.
Old Paint
There are some essential steps that you can follow when you’re getting ready to paint your wooden deck. First, you must thoroughly clean your deck. Next, it should be pressure washed to get rid of the dirt and old paint. It also needs to dry properly because paint cannot adhere to wet wood, and you’ll be painting over the surface for years to come. In addition, you’ll want to follow certain guidelines to ensure that your deck will look great once you’ve finished painting.
Before you begin painting, you must remove the old paint from your wooden deck. Scraping will not remove all of the old paint, and the resulting wood will still have large areas where the old paint is still stuck. After scraping, you must sand the deck to smooth the edges between the bare wood and the old paint. You can use a power sander or regular sandpaper. You can use a sanding sponge if you don’t have a power sander.
How to Prepare A Wooden Deck For Painting
Once you have sanded the deck and removed any loose paint, it’s time to apply the new paint. Typically, you’ll need Exterior Paint, a paintbrush, and a garden hose. If you have a power sander, you’ll need to sand the wood more quickly. A sanding sponge is an alternative to regular sandpaper.
Exterior Paint
If you want to paint your deck, you have to follow some basic steps. To begin with, you have to remove any existing wood oil. If the wood was never treated, you can buy a wood oil remover product to use. You also have to sand the surface to remove any peeling paint. It’s a good idea to use fine grit sandpaper so that the color will be removed completely.
Once you’ve scuffed and cleaned the surface of the wood, you’re ready to apply the paint. If there’s any existing paint on your deck, you can use a scuff sanding pad to get rid of those imperfections. Make sure to let the sanding dry thoroughly before adding a new layer of paint. Applying more paint to a newly-painted deck will weaken it. So, patience is a must.
If you don’t have any previous experience painting exterior surfaces, you can hire a professional to do the task for you. These experts can give you the necessary tips and tricks to ensure a successful exterior painting project. Just be sure to follow these tips to ensure a flawless finish. This will help you paint the deck the right way. There are a lot of things to keep in mind when painting your deck.
Garden Hose
A garden hose is one of the most effective ways to clean a wooden deck. You can use a power washer or a garden hose to clean your wooden deck. A pressure washer is best for cleaning large surfaces, but a garden hose can be just as effective. First, use the hose’s spray nozzle to avoid getting the dirty water on the deck boards. Then, let it dry for at least two days.
The first step is applying a cleaning solution to the deck’s surface. Many deck cleaners are concentrated and require additional water. Follow the directions on the package, and pump until the product starts to saturate the surface. Scrub the deck thoroughly. Once you have removed all the loose dirt and debris, rinse it with the hose. The sprayer can be adjusted to reach nooks and crannies, but it is important to use a hose sprayer that will not gouge into the wood.
Next, apply a thin coat of waterproof stain and sealant. Make sure to cover any hard to reach areas with the stain. This includes railings, steps, and board ends. Also, ensure that the paint covers all the wood. Wear protective clothing and safety goggles, as you’ll want to protect yourself from the harsh chemicals. Also, avoid working in the sun while applying the stain since it may cause damage to the wood surface.
Paint Brush
To make your deck look better and last longer, you should follow these tips to prepare your deck before applying paint. Wooden decks naturally resist water damage, but a clear coat of paint will help slow the weathering process. Ensure that you have the right paint and follow the manufacturer’s directions to avoid any problems. If you’re unsure how to prepare a wooden deck for painting, follow the manufacturer’s instructions and consult a paint color chart.
First, prepare the deck by sanding it thoroughly. If the wood is rotten, you must scrape it down. Use a wire brush to remove loose paint chips. Don’t forget to clean cracks and gaps. This will make it much easier to paint the deck. Next, prepare the paintbrush for applying the paint. You can buy various sized brushes for this purpose.
Wooden Deck
Before painting your deck, you need to prepare it carefully. Although painting is easier, deck prep takes longer and involves more steps. But the benefits of doing it right are well worth the effort. Proper deck prep will ensure a longer-lasting coating, better paint usage, and an attractive finish. Follow these steps to prepare your wooden deck for painting. We will discuss each step in detail to help you get started. Then, you can begin painting.
To get started, clean your deck by using a power sander or a sanding sponge. Scraping often does not remove all the paint from wood. Some areas still have a large amount of paint stuck to it. Since new paint will stick to this, it is important to sand the wood thoroughly. Power sanders make the sanding process faster, but you can also use regular sandpaper if you do not have a power sander.
Painted Surface
If you plan to paint your wooden deck, here are a few things you must do first. First, you should thoroughly clean the deck and pressure wash it to remove any dirt and old paint. After cleaning, allow it to dry completely before applying the paint. Paint will not stick to wet wood expands when it is wet. In order to prevent this problem, prepare your wooden deck by sanding it before applying the paint.
Next, you need to sand down any areas that have been covered with paint and sealant. If you use a power washer, make sure to use a gentle setting so that it doesn’t splinter the wood. After sanding, sweep off any excess dust. Don’t forget to sand down the banisters and spindles. Next, paint the entire deck. Allow it to dry completely before placing any furniture on it or putting up a rug.
Painted Deck
Preparing a wooden deck for painting is an important step to ensure that the end result is good. Preparing the deck will help ensure the best finish possible, resulting in an even coating and optimal paint application. Read on to learn how to prepare a wooden deck for painting. Here are some tips for the perfect deck painting job:
Clean the deck thoroughly with a pressure washer, removing any dust and debris. You may also want to apply a clear sealer to help slow down the weathering process. Wood expands when wet, so paint will not adhere to it. Before painting the deck, it is important to allow the surface to dry completely. After a week, you can begin the painting process. Once the first coat dries, follow up with another coat.
Sand the wood before applying the paint. If it has been painted in the past, make sure that it is clean and free from dust and loose paint. Then, use a pressure washer to remove any loose paint. Be sure to have a large drop cloth nearby, as paint chips can easily cling to wood surfaces. Clean the wood thoroughly, and it will be ready to paint. The finished product should last two to ten years, depending on its care.
Power Wash
A power washer can remove loose paint from wood surfaces and prepare them for a fresh coat of paint. Power washing removes excess power and water but leaves traces on porous materials like bricks and wood. Because these surfaces need time to dry thoroughly, it’s best to allow 48 hours to dry before you apply a fresh coat of paint. This should be enough time for your deck to dry completely.
When power washing a wooden deck, start with a gentle sweeping motion while keeping the nozzle parallel to the surface. Pull the trigger from the beginning of your first pass and walk the length of the deck using a sweeping motion. Then, pull the trigger a second time, overlapping the first one, and move the nozzle up and away from the deck before continuing with the final pass.
First, power wash the area covered by outdoor furniture. Then, use a narrower power washer attachment. A zero-degree nozzle will increase pressure and concentrate the spray. This is a more expensive option but poses unnecessary safety risks. Power washing requires time and patience, and a power washer can be tiring. Wear protective clothing, including safety goggles, long pants, and gloves. If you want to paint your deck, avoid wearing loose clothing with a lot of holes.
Apply Paint
If you want to stain or paint your deck, you must first prepare the wood for painting. Next, sand it lightly with sandpapers ranging from 60 to 100 grit. Sandpapers must be replaced as needed if the grits fade or get clogged. Before painting, wash the deck with a garden hose to remove any dust. Leave it for two days to dry before painting. Once the deck is completely dry, apply two to three coats of KILZ Adhesion High-Bonding Interior and Exterior Primer.
You should also consider the type of paint you plan to use. You can either use oil or water-based paints, but it’s best to choose the same kind as the old one. If you plan to use oil-based paints, it’s essential to apply a primer designed to convert the old paint to the new one before you apply the new paint. Make sure to follow the instructions on the paint label.
References:
https://www.bobvila.com/articles/how-to-paint-a-deck/
https://homeguides.sfgate.com/clean-10yearold-front-deck-before-painting-98858.html
https://www.sherwin-williams.com/homeowners/how-to/decks/preparing-decks