
Interested in learning how to paint bathroom cabinets? This article will guide you through the process, covering key steps such as painting cabinet doors and bathroom vanities, and even educating you on wood filler. By mastering the fundamentals, you’ll be ready to handle more projects in the future. We’ve also included some useful tips to assist you in executing your paint project effectively. Stick to these steps, and before long, you will have a freshly transformed bathroom. The effort invested in learning how to paint bathroom cabinets will surely pay off!
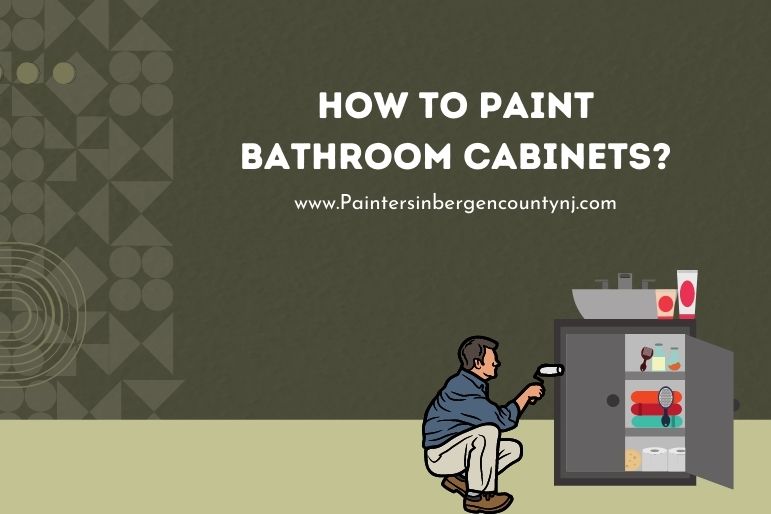
How to Paint Bathroom Cabinets?
The first step in painting bathroom cabinets is to prepare them thoroughly before beginning the project. Preparation is the most important step since 90% of the work in painting involves preparation of the surface. Ensure that the surface is clean and free of debris before you begin painting. Paint must be applied thinly to avoid soaking into the edges and corners. When painting the bathroom cabinets, you can use a roller, brush, or spray paint can to apply the paint evenly.
To begin the process of painting bathroom cabinets, remove the cabinet doors. Most bathroom cabinets have hinges, and there are screws that secure the doors to the cabinet interior. Remove the cabinet doors from their hinges and set them aside somewhere they won’t get covered with paint. To ensure that no paint gets spilled onto the doors, use masking tape to cover the screws and avoid causing damage. To paint the drawer fronts, leave them in place.
Bathroom Vanity
Before you begin painting your bathroom cabinets, it is crucial that you try a sample paint color on a door frame. By doing this, you will be able to get a sense of whether the paint color matches the cabinet. If you don’t like the color, you can paint the door or frame again. Whether you decide to paint the entire bathroom or just the cabinets, testing the paint color will ensure the outcome is satisfactory.
To prepare for painting, you need to make sure that you clean all surfaces thoroughly before you start. Before painting, use industrial strength cleaner to remove all dirt, grease, and grime. Trisodium phosphate can be harsh on the skin, so you need to wear protective gloves while cleaning. If you haven’t already cleaned the surfaces, you can use the painter’s tape to cover them. You can also tape the interior surfaces of the bathroom cabinets with old newspaper.
Cabinet Doors
The first step in painting cabinet doors in the bathroom is removing the existing ones. Next, remove all the hardware and the cabinet doors from their hinges. Next, remove any cabinet hardware that is affixed to the cabinet, and mark their positions with a small number. Masking tape should be used to ensure that paint does not go over the number. After the paint has dried, replace the cabinet doors and hardware. Make sure to allow adequate ventilation in the bathroom, as well.
Oil-based paint should be applied in a well-ventilated room with a steady flow of fresh air from outside. Before beginning the painting process, remove all items from the area. Spread drop cloths across the work area and apply painter’s tape to protect your surfaces. Make sure to label each piece of tape, as well. If your cabinet doors are in close proximity to walls, use a wider tape.
Wood Filler
Before you paint your bathroom cabinets, you’ll need to prepare them for the paint. Use wood filler before you start the painting process. Wood filler can reactivate if it gets too moist in the paint. Most of it is water-based. You can dilute it with water if necessary. After applying it, sand it until it is flush with the surrounding wood. You can also use a mouse sander to save time.
First, prepare your cabinets by cleaning them. Apply a cleaning product to remove any dirt or grease. Mix TSP with water in a bucket. Don’t forget to wear rubber gloves and protective goggles. Then, apply the cleaning solution to the cabinets with a sponge. Let the product dry before painting. Wood Filler is not permanent but can be applied over the previous paint. Once the cabinets are dry, you can begin painting.
The wood grain on oak cabinets is particularly deep and can be seen through the paint. While the grain is visible, filling it is not very difficult. Applying Wood Filler to the wood grain is quick and can be applied to any type of wood. Once applied, it should dry in about four hours. Wood Filler can be applied to any wood. For a smooth finish, you can also apply paint directly over it.
Latex Paint
Latex paint is a great choice if you’re looking to paint your bathroom cabinets. There are many reasons to use latex, from durability to easy cleanability. But whether you decide to use a satin or semi-gloss finish, you should know that both paints are not created equal. Semi-gloss and satin finishes are much easier to clean, while latex paint requires little to no maintenance.
Oil-based paint dries faster than latex and glides beautifully over wooden surfaces. It also dries hard and is generally more durable. While latex paint is easier to clean, oil-based paint will not chip or scratch easily. Regardless of whether you opt for oil-based or latex paint, it’s always important to choose a paint that will last for the long haul. Latex paint is an excellent choice for bathroom cabinets, but consider the benefits of each.
Oil-based or latex paint should be primed with a shellac or oil-based primer. The former is easier to apply and minimizes brush marks. While the latter is less prone to peel-off and bleed, it won’t be as durable. You should also choose a brush with a natural-bristle tip to get into the small areas. Once you’ve selected the best paint for your cabinets, it’s time to get painting!
Lightly Sand
Before you paint your bathroom cabinets, sand them lightly is a good idea. This is necessary for different reasons. First, it can be done to smooth out rough surfaces and improve paint adhesion. However, sanding is not necessary if your cabinets are standard. For example, if you are repainting them with oil stains, you can use 120-grit sandpaper to smooth out rough edges.
To lightly sand bathroom cabinets, you can start by removing the cabinet doors. If the cabinets have hinges, remove these. You may want to use masking tape to mark the cabinet door positions. Before you start painting, unclip cabinet doors that use clips. You can also paint the fronts of drawers. Make sure to remove all old hardware before beginning this process. This step is crucial if you want your new bathroom cabinets to look their best.
Before you start painting, you should clean the cabinet faces and vanity with a non-sudsing cleanser. Doing this will help the primer adhere to the surface. Make sure to use a damp cloth to wipe away the sand dust. Also, it is a good idea to protect the vanity’s counter top and walls from sanding dust. Once the walls and vanity have been thoroughly cleaned, you can apply new paint.
Bathroom Vanity Makeover
To paint bathroom cabinets, it’s necessary to prepare the surface. First, prepare painter’s tape to cover the edges of the cabinet and protect the floor, mirror, and cabinet gliders. Start by priming the cabinet faces and doors using a paintbrush or roller. A tapered brush is recommended when painting cabinets with intricate detailing, while a paintbrush is easier for large, flat surfaces. Before applying the paint to the cabinet faces, remove any hardware.
Then, prepare the paint by masking off the edges of the vanity top, the cabinet underneath, the floor, and the walls. If your bathroom cabinets have hardware, use a spray-painting gun or polish to give them a new appearance. If you plan on changing the hardware elsewhere in the bathroom, you may want to replace the hardware altogether. Once you’re finished painting the cabinets, you can then install new hardware and make the cabinet look brand-new.
Painting bathroom cabinets is a great way to give a new look to your bathroom without breaking the bank. While it might seem like a big undertaking, painting cabinets can make a huge difference in the look of your bathroom. Not only will they look brighter and new, but the new color will last for years. And you’ll save money, as painting bathroom cabinets is relatively inexpensive. In addition, this project can be done on weekends and will last for years.
Oil Based Paint
If you are looking to change the color of your bathroom cabinets, you may want to try using Oil Based Paint. This is a great option because you don’t need to use a primer or water-based paint. You can also use a high-adhesion primer instead of a standard one. Before painting your bathroom cabinets, you will want to prime the cabinet’s outer surface with high-adhesion primer. This primer is specifically designed for bathroom cabinets and can be purchased from any home center.
Before applying the paint, you should make sure to have the proper ventilation. If you plan to paint the cabinets with a paintbrush, you must use a respirator. You also need to have a steady flow of air from outside your bathroom. Before painting, you need to clear the cabinet of any objects. You should then spread drop cloths around the area and use painter’s tape to cover the cabinets. When you use painter’s tape, make sure to label each piece to avoid any problems later.
Cabinet Drawers
Before you begin, you should remove any cabinet doors or drawers from your bathroom. To do this, you should use a degreasing cleaner and then rinse the cabinet surfaces well. If your cabinets have doors and drawers, label each with a piece of painter’s tape or a permanent marker. Before you begin painting, clean the surface of the cabinets by wiping off any old paint or soap scum. Also, you should clean any hardware that may be attached to the cabinet.
While painting a bathroom cabinet, you need to make sure to leave adequate ventilation. If your bathroom is small, you may want to work outside if possible. Oil-based paints may separate from each other more easily and require more coats. After you finish, install new hardware and replace cabinet doors and hinges. You can also try painting cabinets with less pronounced wood grain, such as oak. This method will leave some visible wood grain in the finished product.
Kitchen Cabinets
Before starting, you should sand your cabinets. If they’re factory-finished, you may need to use 120-grit sandpaper or a sanding sponge to smooth the surface and remove bumps and scuffs. Once you’ve finished painting the face frames, you’ll need to paint the drawer fronts, cabinet doors, and separate wood pieces. Make sure to apply two thin coats of paint to ensure even coverage and a smooth finish.
First, remove any clutter and debris from the cabinets to paint the cabinets. You can use a tack cloth to catch any missed dust. Next, paint the entire surface with a roller brush using an even pressure. After the first coat, you can lightly sand it. Use a damp cloth to wipe off the dust. After the first coat of paint, wait at least 12 hours before applying a second coat. Make sure to follow the paint tin instructions.
If you choose to use a primer, make sure you get one that is specifically designed for cabinet surfaces. There are many varieties of primer, including multipurpose and specialist surfaces. Always choose a primer that will be compatible with the paint you plan to use. Apply the primer evenly on the entire surface. Allow it to dry completely before applying a second coat of paint. If you’re painting a large area, you may want to allow more time for the paint to dry.
Light Sanding
Before you begin the process of painting your bathroom cabinets, you’ll want to remove the old paint. It will make the new paint adhere better and prevent the wood’s imperfections from showing through. You can do this with a chemical paint stripper. After you’ve removed the old paint, you can apply an oil-based primer. Primer helps prevent wood imperfections from showing through the new paint. Light sanding will prepare the surface for the new paint to adhere.
After applying a primer, you should lightly sand the surfaces with a tack cloth. If the primer is too thick, you may need to apply a second coat. Always remember that a thick primer will not give you a smooth finish. Sand the cabinets in the same direction as the grain so that you don’t smear it on the surface. You can hire a sanding machine at some hardware stores.
Paint Tray
Preparing for painting your bathroom cabinets starts with preparing the surface. Then, before you start painting, you should remove the cabinet doors, drawers, and hinges from their cabinet boxes. Then, use a paint tray to keep them in place while you paint. Also, remove any hardware, such as faucets or light fixtures, from the cabinet, and label it accordingly. Finally, to ensure that your paint job comes out smooth, wear protective gloves and overalls while working.
If possible, remove the cabinets from their current position. This will make painting easier. If you don’t need them, this is the perfect time to sort through everything and make a list of what needs to be replaced. In addition, you can remove them and store them in another room if necessary. Afterwards, you can begin painting. The paint finish will be much more uniform and cleaner this way. Use painter’s tape to cover any areas that need protection before painting.
Tack Cloth
You may have heard that using a Tack Cloth when painting bathroom cabinets will produce smoother results. While this may be true, it should only be used lightly on the surface. In fact, if you use too much pressure, the cloth may embed in the surface, resulting in bumps in the paint job. To avoid this problem, you can make your own Tack Cloth from a white cotton towel and turpentine or varnish.
Tack cloths come in a variety of colors and materials, from simple cheesecloth to cotton gauze and beeswax. These cloths can be bought at hardware stores, home centers, and paint stores. You can also make your own tack cloth from a white cotton dishtowel, turpentine, or varnish. Make sure that the tack cloth is moist, but not soggy.
If you’re painting your bathroom cabinets, you should use an acid-free paint that repels moisture. Alkyd paints emit more volatile organic compounds, so you should choose a latex-based paint instead. Also, choose a glossy finish, or one that is semi-gloss or high-gloss, as these will hide dirt better than flat finishes. Also, choose a darker color since it hides dirt better.
Fresh Coat
Before you can paint bathroom cabinets, you must prime the wood. A dedicated primer makes the job easier. Before applying paint, wipe the bare wood with the primer in an even, smooth coat. Primer will help the paint adhere to the wood better and save you time and money on the paint. Also, primer can be applied to any surface, including wood. Here are some tips to paint bathroom cabinets. You can also use a Shop-Vac to remove dust from the surface.
Before painting, it is important to test the primer and paint on a door or cabinet first. This way, you can check the color on your cabinet and make any necessary changes. Also, painting a door or cabinet first will give you an easier time if you have a small space. After painting the cabinet, remove the door and hardware and let the paint dry. Finally, makelly, make sure you have the proper ventilation in your bathroom.
Painted Doord
The first step in painting bathroom cabinets is to prepare them for the new look. Before starting, make sure the cabinets are completely empty. This will make the process easier and give you more time to sort through the contents of the cabinet and decide what you want to keep or buy. Afterwards, you can paint the cabinets. This will also give you a cleaner finish, which will make them last longer. You can also use the time to organize them.
Choose the right paint. Oil-based paint works best for wood in damp environments. However, oil-based paints produce higher VOCs, so they are not suited for some latex-based paints available, which are easier on the environment and emit less volatile organic compounds. Choose paint that repels moisture from a higher gloss level than flat finishes, and use darker colors that will hide dirt and fingerprints. While painting, always use a roller cover made from wool or natural fiber.
Sand Cabinets
Preparing to paint bathroom cabinets? Use a primer that with your topcoats to match the surface. If the surface is dark, it will show through the topcoat. Ask the paint retailer for advice. Sand the cabinets first before applying the paint. Then, prepare to start painting. Use the same technique you used to prepare the wall. Sanding and priming will make the finished product much better. The process will be quicker and easier if you follow some simple tips.
Preparing the cabinets before painting is important for getting a smooth finish. It will prevent the paint from peeling or cracking. Sanding also allows the paint to adhere better to the surface. Next, you should use a primer that has a high adhesion. Water-based paints often need a high-adhesion primer, so it’s important to read the paint instructions carefully before you begin. Finally, you can use a chemical paint stripper to remove the old paint.
Painted Doors
If you’d like to paint your bathroom cabinets, the first step is to remove the cabinet doors. You can do this by unscrewing the screws that hold the hinges on the door and, next, remove the hardware from the doors and drawers and set them aside in a safe place before painting. It helps if you have a label for the parts of the cabinet. This way, you can easily put them back together once you’ve finished painting.
If you plan on painting the whole cabinet, you’ll need to remove all of its parts before painting. It’s also a good idea to take the doors off their cabinet boxes, so they won’t get in the way while you paint. This process will also ensure a smooth finish and better coverage. The final product should be able to resist water and dirt, but you’ll need to sand the cabinet door parts to ensure the paint is applied evenly.
Bathroom Vanities
If you’d like to change the look of your bathroom, there are several ways to do it yourself. The most important step is to prepare the surface to prevent paint from soaking in the corners and edges. Then, before you paint, remove any drawers or doors. You can also use old newspapers to line the inside of the cabinets before painting. Finally, using painter’s tape can help protect the cabinets while painting them. Here are some tips for a great finished product.
Before you begin painting your bathroom cabinets, make sure you have a drop cloth ready. This will protect the floor, mirror, and appliances from paint drips. Also, prepare a table in another room so you can easily gather all of your tools. After you gather your tools, prepare the surface to be painted. If the vanity is large, you may need to use a separate table. If the bathroom is small, use the floor to protect it.
Oak Vanity
You can take a few steps to prepare your oak vanity cabinet for painting. Firstly, remove all hardware from the cabinet. Then, lightly sand the cabinet’s surfaces with a fine sanding block. The goal of sanding is to remove the existing finish, not to remove it completely.
Prepare your surfaces. Before you begin painting, make sure to clean the cabinet’s surface thoroughly. This will prevent the paint from affecting the surfaces underneath. There are several cleaning products available on for example, yourket. You can use a no-rinse TSP substitute to clean cabinet doors. Simply soak a cloth in the solution and scrub the surface of the cabinet. Wear gloves and eye protection. You can also use a paint roller or a sponge brush to hold up the cabinet doors while you work on them.
Next, clean the cabinet’s doors and drawer fronts with a degreasing cleaner. Once you’re done cleaning them, use a sponge to remove any remaining residue and dry the surfaces thoroughly. If the cabinets have handles or drawers, you may want to remove them before then once the cabinet is dry, you can reinstall them. Just make sure to take special care when applying paint to the handles and drawers to prevent the paint from bleeding into these places.
Paint Colors
When painting bathroom cabinets, be sure to use paint that is made for cabinetry. Most paints made for walls will not hold up well against the high-use environment of your bathroom. They will also tend to pool, leaving you with splotchy results. Make sure to check out these tips to get the perfect paint job. After deciding on your color scheme, you should start shopping for the right paint. There are several different types of bathroom cabinet paint available on the market.
While neutrals work well in most bathrooms, bold colors are best suited for smaller spaces. Paint colors for bathroom cabinets should coordinate with the fixtures to create a cohesive look. Since bathroom cabinets are typically not at eye level, you can go for stronger accent colors such as pink or yellow. A subtler color like brown or grey will also blend in nicely with your decor. If you want to add some flair to your bathroom, you can also go for an off-white color.
Allkyd Paint
If you are considering painting your bathroom cabinets, you might want to consider using Allkyd Paint. This type of paint has a high sheen and is waterborne, meaning it will not chip or peel away. It will also last longer than latex and will not yellow over time. However, it does require more time to dry than latex paint, so you may not want to use it on a one-day project.
The best Waterborne Allkyd Paint is Benjamin Moore Advance. It has a choice of finishes, including satin, high-gloss, and semi-gloss. The satin finish is a good option, as it hides imperfections. However, it can be expensive. Therefore, you should consider your budget when selecting this type of paint. In addition, there are several varieties on the market, so you need to decide which one will suit your needs the best.
Before applying Allkyd Paint for bathroom cabinets, you should make sure to clean the cabinets thoroughly with a cleaning product to remove any grease and dirt. To apply this cleaning solution, mix two parts TSP with one part water. Wear rubber gloves and protective goggles, and apply the cleaning solution to flat areas and corners. Make sure to allow the primer to dry completely before painting the cabinet. Then, use a small paintbrush to smooth out any details.
Paint Roller
Changing the paint on bathroom cabinets can make the room seem much larger. Likewise, painting your vanity cabinet can dramatically change the look of the room. As a piece of furniture that is permanently fastened to the wall, it provides a canvas with depth, angles, and curves. A paint roller can help you get a smooth, even finish. This type of paint can also be used on other surfaces, including wood, metal, and glass.
There are a few types of paint rollers available. These are generally made of foam, nylon, or polyester. Some of these are made with mohair or polyester. Both of these materials have high absorbency level, allows them to work on a flat surface with a smooth finish. You can even find microfiber rollers, which are also a great option. These materials are easy to clean and shed-resistant.
Before beginning, make sure you remove the cabinet doors and any fixtures that are attached to them. Then, use painter’s tape to cover the exposed areas on the cabinet, such as the wall next to it. Also, use old newspapers so that the paint won’t leak out. If you’re tackling this project by yourself, remember to protect any wall areas that are near the cabinet.
Drop Cloth
Preparation is essential when painting bathroom cabinets. First, remove all drawers and any other personal items. Next, detach any attached hardware. Lastly, remove any doors and cabinet fronts, if possible. Mark them so you can reattach them later. Depending on the cabinet, you may need to remove the door completely. Once you are done with preparation, start pA drop cloth protects protect your bathroom from sanding dust and paint splatters.
Before you begin painting, make sure to remove cabinet doors and hardware from cabinet boxes. Label them as well. Remove and clean all hardware before painting. Be sure to wear protective gloves and overalls. If the paint is still wet, you may need to cover them with a drop cloth to avoid spills. If you’ve decided to paint the cabinets, be sure to follow manufacturer’s guidelines for applying paint. It’s best to wait 48 hours before reinstalling them.
When painting bathroom cabinets, it’s best to use a mold and mildew-proof paint. This type of paint is especially important for bathrooms because of the potential for mold and mildew growth. Some paint manufacturers even provide mold and mildew-proof paints in satin finishes. In addition, a drop cloth will protect you from accidental messes.
Putty Knife
To paint bathroom cabinets, the first step is to clean them thoroughly. After using soap and water to remove stains, apply TSP to clean stubborn grease and grime. Wear gloves, if necessary. Then, use a putty knife to fill any dents and nicks. Use appropriate filler to adhere to the dents and nicks, then paint. Allow the paint to dry before using it on the cabinets.
Next, use a TSP-free cleaner to make the surface completely smooth. This cleaner is a great alternative to regular sandpaper. It will remove the varnish that has built up on painted and stained wood. Because TSP is harsh, use gloves when working with it. Then, clean the surface thoroughly. After cleaning, apply a primer and paint. Once the primer is dry, it will stick to the cabinet.
After preparing the surfaces, use a cleaning product to remove any stains and grease. Apply the cleaning solution on the cabinet surface and wipe the surface lightly with a sponge. If the surface is smooth, you can apply wood grain filler. If your cabinet has a wood grain, apply wood grain filler. Once it dries, apply the paint. Let it dry completely before applying a second coat.
References
https://www.thespruce.com/painting-kitchen-or-bathroom-cabinets-1822190
https://www.bhg.com/bathroom/vanities/how-to-paint-bathroom-cabinets/
https://www.bobvila.com/articles/how-to-paint-bathroom-cabinets/