
Popcorn ceilings were quite trendy during the ’70s, often serving as a quick way to add texture to plaster ceilings and drywalls, thereby covering flaws without the need for painting. Despite their visual appeal, the rough texture of popcorn ceilings tended to accumulate a significant amount of dust and cobwebs, which meant more cleaning work. Furthermore, fixing holes and cracks on a popcorn ceiling using a drywall joint compound proved to be quite a challenge.
Because of this, homeowners want to get rid of their popcorn ceilings, but they don’t know how to do it. Luckily, we’ve outlined the simple steps to take to get rid of the texture. Be warned that the removal process is messy, but it’s worth it, especially if the substrate is still in good shape.
What tools you need:
To get the job done efficiently, you’ll need some tools, which include:
- Painter’s tape
- Dust mask
- Ladder
- Plastic sheeting or drop cloths
- Garden sprayer
- Drywall taping knife or a putty knife
- Safety glasses
- Paint
- Paintbrush
- Roller
A Scrape Test
Removing your popcorn ceiling requires a lot of prepping. But before you go through the trouble, start by scraping a small area to get a feel of how easy or hard scraping off the texture is. Try scraping it dry first and then proceed to dampen the surface. Some textures fall off easily without water, but you’ll generally have an easier time after wetting the surface.
But if the ceiling was painted, the texture won’t absorb water. In such cases, use environmentally safe paint remover before spraying water.
Test for Asbestos
In older homes (before 1980), popcorn ceilings installed contained asbestos, a mineral that causes lung cancer, mesothelioma, and other cancers. With the risk exposure to asbestos carries, it’s important to determine if the ceiling texture contains asbestos before you start scraping the texture off. To do this, get in touch with the local health department and request sample testing.
Cover the texture with tongue and groove planks or new drywall if the sample test comes back positive for asbestos. Alternatively, you can hire an asbestos removal contractor to help remove the ceiling.
Prep the House for the Mess
After you’ve determined that the ceiling isn’t painted and can absorb water, and is asbestos-free, it’s time to prepare for the actual removal and the mess that comes with it. Cover the walls and floors with a plastic drop cloth before starting.
Plastic drop covers are better than canvas drop cloths since the latter allows water to soak through. Also, cleaning up the mess is easier with plastic covers since you can ball everything up when you are done and throw it away safely.
Note: leave the plastic cover in place even after removing the ceiling texture to catch the mess from sanding and repairs later.
Remove Furniture
If you can remove the furniture from the room, do it before starting. Remember, getting rid of textured ceilings is messy, especially if it’s your first time. The last thing you want is to dance the ladder around the furniture as you try to reach new spots.
If removing all the furniture from the room is not an option, cluster them in a corner and cover them with a plastic cover as well.
Remove Ceiling Fans and Fixtures
Some homeowners are tempted to leave the ceiling fans and light fixtures in place as they remove the texture. However, while leaving them in place will save you time when prepping, working around them will be harder. Plus, accidentally damaging electrical fixtures with water when wetting the surface is a risk of accidentally.
Because of this, it’s a great idea to remove all ceiling fixtures and store them in a different room during the project.
If you have recessed lights, you should stuff rosin paper or newspaper inside to protect them from water. Also, it’s good and safe practice to switch off power to the specific fixtures at the fuse box or breaker panel.
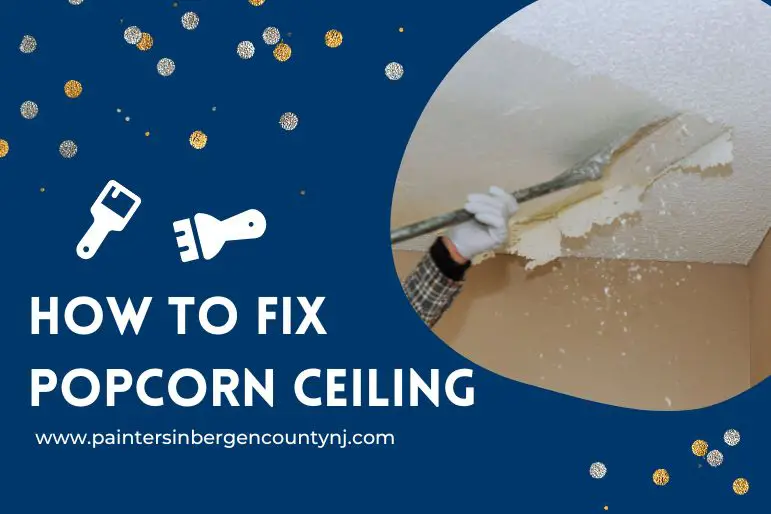
Wet the Surface
To make it easier to scrape the texture and reduce the dust in the house during the removal process, you should wet the ceiling with a pump sprayer or a spray bottle. Let the warm water soak into the texture for 15 minutes before you start scraping.
Be careful not to spray too much water as this might damage your drywall or loosen the joint tape. If the texture doesn’t soften after the first round of spraying, repeat the process and wait for 15 more minutes.
If you notice no change, the ceiling might be painted, or the texture might have been mixed with paint before application preventing water penetration. In some cases, you can dry scrape the painted texture to expose the unpainted texture and proceed with your wet scraping.
But if the paint was mixed into the texture, you’ll have to dry-scrape the ceiling or cover it with T&G boards or drywall.
Cover Electrical Boxes
Shut the power off to electrical boxes in your ceiling and protect them with painter’s tape. This helps to keep the wires dry when you are spraying water on the ceiling and get rid of popcorns on the ceiling.
Moreover, you should overlap the junction box’s sides with painters’ tape and trim them with utility knives without cutting the wires.
Handle Small Sections
Instead of taking on the entire ceiling at a go, wet and scrape small ceiling portions at a go. A 4 x 4 ft area is ideal. If you choose to work on a large portion of the whole ceiling at a go, the texture might dry before you scrape it. When this happens, you’ll need to respray the spot and wait for an extra 15 minutes before you scrape.
Use a Mud Pan
Although the removal process is generally messy, you can reduce the mess created by using a mud pan to catch wet popcorn after scraping. This way, the floor is cleaner, and you won’t have to track the mess around the house. Also, you can clean the scraper on the pan’s edge to remove stuck wet popcorn.
Prevent Gouging
Round off the popcorn scraper corners so that it doesn’t gouge the ceiling and leave ceiling wounds you’ll have to repair. You can use a sander, an electric grinder, or a file to round off these corners.
Smooth the Surface After Scraping
It’ll look better after scraping the old ceiling, but it won’t be paint ready. There’ll still be some gouges and tiny dings to fix before it can look professional. At the very least, you need to sand the surface and smoothen it before painting.
Is Removing Your Popcorn Ceiling Worth It?
Removing the textured ceiling is well worth it, especially if you have problems with bad lighting, maintenance, and an unpleasant appearance. Below are a couple of things to consider when planning a popcorn ceiling removal project:
- Improved Lighting
Popcorn texture ceilings have small craters that cast small shadows. This shadow effect makes the room darker and gloomy. By removing the popcorn ceiling, light bounces off flat surfaces and reaches more spots in a room.
- Creates More Room
Popcorn ceiling texture gives the illusion of a swollen ceiling, making it look lower than it actually is. As a result, the rooms feel smaller and more cramped than they are. Removing popcorn leaves a flat surface making the ceiling appear higher and less congested.
- Better Aesthetics
In the 70s, popcorn ceilings were a standard install. But as people adopt modern home designs, they are less and less attractive.
- Cleaner Ceilings
Popcorn ceilings attract cobwebs and dust. And given that most ceilings are white, they don’t hide dirt hence needing a lot of clean up. WOn the other hand, with a flatter ceiling, dirt sticks less on the surface and cleaning it is easier.
Can Popcorn Ceilings Be Patched?
Popcorn ceiling repair is relatively difficult. The main challenge of patching popcorn ceilings is matching the existing texture to achieve a seamless patch.
How Can I Cover the Ceiling Texture Without Removing It?
If you don’t want to remove the popcorn ceiling, you can cover it with drywall or lighter materials like wood paneling, planks, or paint. A good option is to use gypsum board paneling like drywall but lighter and easier to support. However, installing drywall alone can be difficult, and you may have to remove and replace the crown molding.
How Much Does Professional Popcorn Ceiling Removal Cost?
If you prefer to outsource the job, prepare to invest money and time. A 12 x 12-inch popcorn ceiling might take a week to remove the texture, prime, and skim coat. The costs for skin coating can vary between $800 and $1500, depending on your ceiling’s condition. If you need priming and painting, you might spend $2,000 and $2,700.
Do You Need to Use Water When Removing Popcorn Ceilings?
Not always. You can try to dry scrape the popcorn off the ceiling and see if it’s possible. However, a wet scrape is way easier than a dry scrape. When you decide to go the wet scraping route, ensure you don’t overdo it. Too much water might seep into the drywall and damage it. When this happens, the project will include repairing the ceiling before painting.
https://www.ncbi.nlm.nih.gov/pmc/articles/PMC4984962/
https://www.homedepot.com/c/ah/how-to-remove-popcorn-ceilings/9ba683603be9fa5395fab906c93d537
https://www.realhomes.com/advice/how-to-remove-popcorn-ceiling