
The question of how long it takes to paint a room often bothers many homeowners. By perusing our guidelines on paint jobs, primer, and professional painters, you can gain the answer to this frequently asked question. Our guidance also encompasses the application of painter’s tape and evaluation of paint quality. Continue reading to expand your understanding. Here are some tips on painting a room.
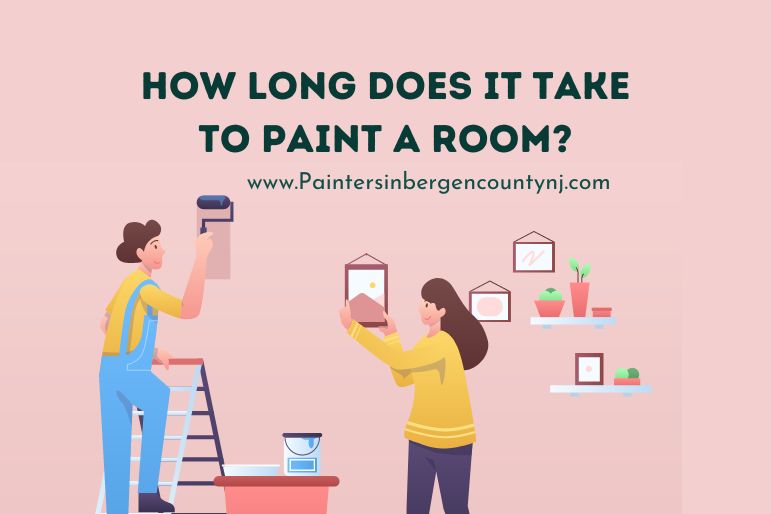
How Long Does It Take To Paint A Room
To answer the question, “How long does it take to paint a room?” it is helpful to consider the size of the room. For example, a ten by fifteen-foot room requires approximately one to two hours of painting time. However, the length of time that each room takes to complete will vary depending on the type of paint, the paint application process, and the amount of prep work involved. You can also reduce the time it takes to paint a room by only painting a portion of it, such as a feature wall.
Several variables determine how long it takes to paint a room. While the size of the room will have the biggest impact on the overall time required, several factors should be kept in mind when planning your painting schedule. The first step involves setting up the room, which includes laying down floor material, covering electric socket covers, and preparing the surface. Once all of these are ready, the painter can start painting. It takes approximately 40 seconds per square foot to complete one layer of paint.
Paint Job
Painting a room takes time and patience. You need to carefully prepare the walls and allow them to dry before you begin painting. The bigger the room, the longer it will take to paint. For example, the average bedroom is four hundred and thirty square feet, so it would take a painter at least six hours to paint a room of this size. Professional painters, however, can often cut this time in half by hiring experienced painters. However, if you are impatient, you may want to consider hiring a painting contractor.
A paint job takes time, so expect to wait a few days for a professional to finish it. While some car painting shops advertise a three-day turnaround, most people should plan on spending a week or more in the shop. This delay is because new paint cannot be applied directly over old paint, which may have oxidized and faded. Therefore, prepping the surface is necessary before new paint can be applied, and this can raise the cost of the entire job.
Painter’s Tape
Taping the room is a vital part of painting. Taping the edges of a room will allow you to see what you’re doing and where you might have to make corrections. There are several types of tape available; the type you use will depend on the surface you’re painting. The most common is 1.5″ tape, which offers some margin for error. However, if you’re painting doors and trim, you’ll need wider tape. Likewise, if you’re painting a narrow room with thin glass or baseboards, a 1″ tape will work great.
The first step is to tape the frame. The painter must carefully prepare the walls before applying tape, as dust will cause paint to leak onto the taped area. Wipe down any area to be painted with a damp cloth before applying tape. Then, allow the tape to dry. You may need to repeat this step more than once, depending on the size of the room. After all, you can’t do it all at once.
Professional Painters
There are many factors that make Professional Painters take longer to paint a space. First, let’s look at time. While most of us want to stay within our budget and not waste all of our time painting, painters do have to be on their game. Therefore, you can expect the painting process to take a bit longer than you would like. However, the amount of time it takes to complete a room will vary depending on several factors, including the size of the room and the number of details on the walls.
Preparation work takes time, and you should add an additional day to your project. If you’re doing it yourself, you’ll have to rely more on painter’s tape and practice cutting in. A room that’s large will also take longer. Depending on the size of the room, this preparation work may take up to two hours. The more time it takes to prepare a room for painting, the more you’ll pay for the finished product.
Prep Work
Most of us are eager to start painting, but not everyone realizes just how much preparation is required before we actually start painting. Whether it’s preparing the walls for painting or getting ready for the final product, a good prep work will go a long way towards making the finished product look as beautiful as possible. Here are some tips to help you prepare your room for paint. You should first move all heavy furniture to the center of the room, if possible. Next, cover the floors with canvas or plastic drop cloths.
The walls should be completely free of debris and dust. This includes flaky plaster and paint that has peeling paint. If you are applying a new paint, the surface must be even and smooth, and any hardware should be removed and placed in plastic sandwich bags. If you plan to paint large furniture, cover it with drop cloths. If there is any exposed flooring in the room, you should cover it with drop cloths to protect it from the paint. Walls should be clean before painting, as dust and grease accumulate on them. A duster should be used to remove any dust that may have accumulated.
Drop Cloths
Using drop cloths is a crucial step in the pre-painting prep work. These large sheets of fabric, which can be made of canvas or plastic, protect surfaces from splatters and larger spills. After taking out all the furniture and other items from the room, lay down the drop cloths on the floor and walls. Only large furniture should remain in the room.
The first step in painting is to protect the floor. Newspaper is not enough to protect the floor. You’ll want to purchase a professional-style drop cloth that covers the entire room. A heavy canvas drop cloth is safer than plastic and is ideal for protecting the flooring and furniture. It also prevents splatters and drips. Whether you paint a room inside or outside, be sure to protect furniture and carpet with drop cloths.
Plastic drop cloths have limited purpose but are light and durable. Use tarps if you need something more durable. However, they can be slippery on indoor floors and must be glued down or taped to ensure that they stay in place. Plastic drop cloths are great for covering furniture and for painting exteriors. You can use drop cloths with plastic coating or vinyl.
Paintable Acrylic Latex Caulk
Many people are confused about the difference between silicone and paintable acrylic latex caulk. Silicone caulk can’t be painted, and it usually comes in a white or clear color that doesn’t match the overall decor of the room. So, before you begin painting a room, it’s important to know the differences between the two types of caulk. Paintable acrylic latex caulk does not require priming and can be painted in just two to four hours.
Paintable acrylic latex caulk is a mix of silicone and acrylic materials that will adhere to most surfaces and can be painted. Silicone caulk is only paintable if it has been primed before application, so it’s best used on areas that don’t get water or stains. Paintable caulk is easier to work with, and it adheres better to surfaces. Unlike silicone, paintable acrylic latex caulk is cheaper than silicone.
Too Much Paint
The first thing to keep in mind is that too much paint takes a lot of time to dry. Paint dries best at temperatures between 50 and 80 degrees Fahrenheit. When the room is too cold, the paint won’t dry properly, and you’ll end up with drips or runs in the corners. To avoid these problems, start painting from a distance, about 1/2 inch from the cut-in area, and drag your brush along it. You may need several coats of paint to cover this area.
Once the paint has cured, you must wait a certain amount of time before moving furniture or washing the walls. This can take as long as 24 hours, and you might not want to move anything back for a week while your paint dries. Professional painters will be able to complete the job much faster, as they have the process down to an art. In addition, they’ll leave minimal marks on your wall and time your paint to dry.
Painter’s Putty
Before painting a room, you must use primer on the bare wall. Priming is a crucial step as it improves the adhesion of paint. However, not all bare walls require primer. It’s best to use a primer that’s suitable for the condition of the wall. For example, if your room has bare walls, you can opt for painter’s putty instead of spackle.
When mixing the primer and painter’s putty, ensure the surface is smooth and free of imperfections. Fill any gaps with a putty knife and smooth it out. Allow the putty to dry while you prepare the rest of your materials. Next, pour the primer into a clean tray and get a sandpaper cut to palm size. If you’re using a brush, you can wipe the dust off of the sandpaper with a cleansing cloth. Sanding should take less than 10 minutes. The primer and painter’s putty should be dry within two hours.
You can apply the second coat of putty either horizontally or vertically. Some people prefer to apply it vertically, while others prefer to do so horizontally. In any case, you should follow the same technique as the first coat. Start with the lower part of the wall so you don’t have to reach up. Then, apply the second coat of putty using a trowel.
Latex Paint
How long does latex paint take to cover a room? The answer can vary depending on the amount of paint you choose. The more layers you apply, the longer the dry to recoat time will be. Typically, two coats of latex paint are sufficient. However, three or more coats will increase the drying time and may not be covered entirely. You can also use a primer before painting to speed up the process.
While latex paint is renowned for drying quickly, the fact is that it’s still fragile until it dries out properly. It takes at least two hours to dry after you’ve applied the first coat, but it will take several days to cure fully. The time it takes to cure will vary depending on the humidity and temperature of your home. Humid climates will require more time, so painting during the humid summer months will take longer.
When applying latex paint, you should try to finish it before noon. Paint dries more quickly when it’s at a higher humidity, but it will take longer to dry if the room is too cool. Ensure that the room has adequate ventilation to promote quick drying. You can use a fan to speed up the drying process. During these hours, you should also make sure that you cover any items you intend to paint.
Chipped Paint
When you’re painting a room, one of the most frustrating things you can encounter is chipped paint. Often, it keeps peeling and coming off. Using a putty knife, a wire brush, or a paint scraper; you can easily remove loose pieces of paint. Patching is the next step; you’ll need to carefully apply the appropriate patching material. Then, apply it to the chipped areas, and leave it to dry according to the manufacturer’s instructions.
While it may seem like the easiest way to fix chipped paint, this method will only temporarily cover the problem. While painting over chipped paint may work, it will not give you the smooth finish you’re looking for. It will also give your new coating an uneven surface, which won’t look professional. And the new paint will soon peel off the wall, leaving you with an unattractive room. This method is a waste of energy and time, and it won’t last.
Besides the chipped paint, there are other problems that can cause paint to crack. For example, improper surface preparation or the use of a poor quality paint can cause this problem. It also fails to adhere to the surface and adjust to changes in temperature and humidity. Another common problem is mud cracking, which results from too thick paint application and extremely dry conditions while painting. You can fix mud cracks by scraping them off with a wire brush and priming them.
Finally Start Painting
Before you finally start painting, it is important to have a plan. While moving furniture may not be possible, you can cover it with plastic sheets and tape. Next, remove wall decorations, light fixtures, ceiling fan blades, and switchplates. Finally, before you start painting, be sure to disconnect any electrical circuits so you don’t end up with paint all over the place! Once these steps are completed, you can finally start painting.
To prepare the room for painting, you need to remove all the furniture and put them in their proper place. Next, make sure you have cleaned brushes and rollers. The rollers are inexpensive, and brushes may be a little bit more expensive. However, keeping them clean will allow you to reuse them later. Finally, make sure to clean off any excess paint. You may need to touch up an area, and you can store any excess paint in a jar to use again later.
Painting Techniques
Before you start painting a room, be sure to prep the surface and move furniture away from the wall. You can also use a drop cloth to protect the floor. Next, remove any picture frames and light switch covers. If you notice any holes or dents in the wall, you can fill them with spackle. A smooth surface is essential for the paint to adhere. After that, paint the room according to the manufacturer’s instructions.
When painting the ceiling, use a smooth horizontal stroke that follows the direction of the walls. When painting the room’s walls, use a 2-inch-wide border to prevent drips, sags, or runs. Avoid cutting in the wall, and roll the paint as you go. Make sure to pre-wet latex paint before painting. This will prevent it from drying too fast. While this may seem like a lot of work, it will make the process of painting a room go much more smoothly.
Whether you’re looking for a new look or a complete transformation, painting is a great DIY project that will refresh a room. It’s also very cost-effective, and you can paint a room yourself or with family and friends. You’ll need the right tools and paint techniques for an even, professional finish. Consider renting or purchasing a paint sprayer to save time and money. There are also many options for renters online. Before you start, remove any furniture from the room, clean the walls with a clean sponge, and choose a paint that will cover imperfections.
Excess Paint
Painting a room with a primer is an excellent way to avoid streaks or uneven surfaces. While some primers will cover up scratches, dents, and other marks, others will not. Regardless of the type of primer you use, it is important to follow directions carefully and ensure the job is completed properly. Before starting the paint job, load the brush with the appropriate amount of paint. Tap it off the end to remove any excess paint.
If the paint is too thick or too thin, it may sag, creating an uneven mess. The same applies to if you are painting in a very cool or humid room. If you’re painting in temperatures outside of 65 degrees Fahrenheit with moderate humidity, you may experience problems with your work. Adding another coat of paint may even be necessary to make it look good. If you’re having trouble applying a coat, check the paint’s adhesion before moving on.
Roll Paint
When it comes to paint jobs, how long does it take to roll paint a wall? Ideally, a painter should spend approximately 40 minutes per coat with periodic inspections. However, if there are several small details, it may take longer. If the room is small, an average painter should take less time to roll paint a room than a large one. Alternatively, an experienced painter can use extension rods with large rollers to cover a larger area.
In addition to rolling the paint out, you should also cut the corners of the room. Most DIY painters simply roll out the paint onto the walls. Pro painters cut into the walls before rolling the paint so that the paint covers the entire wall seamlessly. Make sure to wipe off any excess paint to avoid dripping or smudging the paint. During the final coat, you should pay special attention to overlap marks and clean the paintbrush.
Paint Soaks
How long does it take to paint a typical sized room? This depends on several factors. A room’s size, preparation, and number of layers of paint all factor into the time required. For example, a room with a ceiling height of 9 feet would take about 4 hours to paint. A smaller room, such as a half-bath, would take around half as long. But larger rooms can take much longer.
Painting a room requires two coats of paint. That doubles the time needed. Also, you’ll need to wait while the first layer dries. Typically, most painters first apply a base coat of primer to the walls. This must dry before you start painting the second layer. You can also apply sealers over the paint to give it a protective finish. This process takes one to two hours, though.
Painting is not an easy process. It requires standing in awkward positions for hours. In addition, it can cause arm aches. Hiring a professional painter might be a good idea if you’re getting older and want a break from the tedious task. A professional can do the job more efficiently and in a shorter amount of time. Also, a professional painter can speed up the painting process.
References
https://www.thisoldhouse.com/painting/21014898/the-secrets-of-pro-painters
https://www.goodhousekeeping.com/home/renovation/advice/a18680/how-to-paint-a-room/
https://www.marthastewart.com/8125286/how-long-paint-takes-dry