
Thinking about giving your home in Paramus, NJ a cabinet makeover? Caulking your cabinet doors before painting plays a major role in getting that professional and enduring finish. This guide dives into why caulking matters when painting, which caulk works best for cabinet doors, and the unique factors to keep in mind when caulking in Paramus, NJ. Uncover useful tips and secrets that ensure your cabinets look splendid for years.
We’ll also cover preparation and precautions, techniques for caulking cabinet doors, best practices for painting over caulk, and highlight professional caulking services available in the area. Whether you’re a DIY enthusiast or seeking professional assistance, this article will equip you with the knowledge and insights needed to achieve a flawless cabinet transformation.
Key Takeaways:
- Caulking is an essential step before painting cabinet doors in Paramus, NJ, as it provides a smooth and professional finish.
- The type of caulk used should be carefully chosen based on the surface material to ensure proper adhesion and durability.
- Hiring a professional caulking service in Paramus, NJ can save time and ensure a high-quality finish for your cabinets.
Are you looking to enhance the appearance of your cabinet doors in Paramus, NJ? Properly caulking cabinet doors before painting can significantly improve the overall finish and durability.
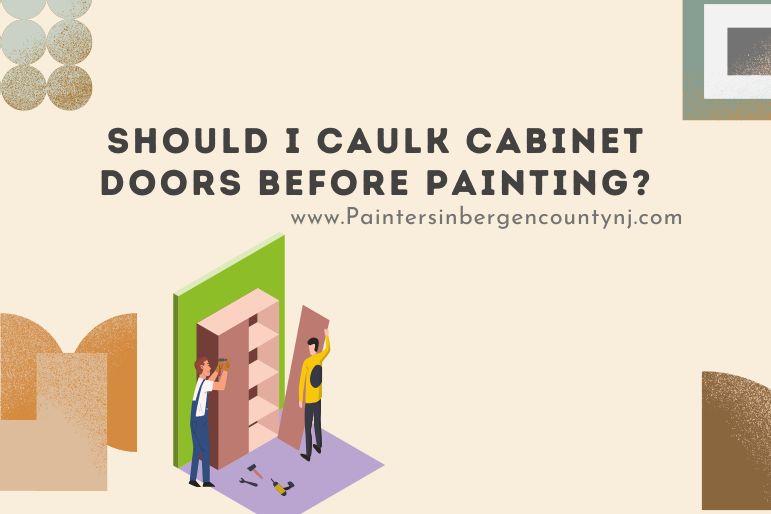
Introduction to Caulking Cabinet Doors
Caulking cabinet doors is a crucial step in the painting process, as it ensures a smooth and seamless finish while preventing moisture and dirt from seeping into the wood.
By filling in the gaps and seams between the cabinet doors and frames, caulking acts as a barrier against water damage and helps maintain the integrity of the wood. Properly caulked cabinet doors also contribute to the overall aesthetic appeal of the cabinetry, creating a polished and professional look.
When planning a cabinet painting project, taking the time to caulk the doors is an investment in the longevity and durability of the finished product. It’s a simple yet essential task that significantly enhances the quality and lifespan of your cabinets.
Importance of Caulking for Painting
Effective caulking is essential for creating a professional and long-lasting paint job on cabinet doors, as it seals gaps and prevents potential damage from moisture or dirt infiltration.
When painting cabinet doors, the application of high-quality caulking ensures a seamless finish by filling any voids and smoothing out imperfections. Caulking acts as a protective barrier, safeguarding the doors against humidity, temperature variations, and other environmental factors that could compromise the integrity of the paint. Without proper caulking, the risk of premature paint deterioration and door damage increases significantly. Therefore, investing time and attention into meticulous caulking is paramount for achieving both aesthetic appeal and long-term durability.
Choosing the Right Caulk for Cabinet Doors
Selecting the appropriate caulk for cabinet doors is crucial to ensure optimal adhesion, flexibility, and durability, aligning with the specific needs of the surface material and environmental conditions.
When choosing caulk for cabinet doors, adhesion is a key consideration. The caulk should bond securely to the material, whether it’s wood, MDF, or another type of cabinet material, preventing any gaps.
Furthermore, flexibility is essential to accommodate the natural expansion and contraction of cabinet materials due to temperature changes. It’s important to consider environmental suitability, as the caulk should withstand the humidity and temperature variations commonly found in kitchens and bathrooms.
Types of Caulk for Different Surfaces
Various types of caulk, including silicone, latex, and acrylic, cater to different cabinet door surfaces, offering specific attributes such as flexibility, water resistance, and paintability to address diverse material and environmental requirements.
Silicone caulk, known for its exceptional durability and resistance to extreme temperatures, is suitable for cabinet doors in high-moisture areas such as kitchens and bathrooms. On the other hand, latex caulk, with its easy application and paintability, is ideal for wooden or painted cabinet doors. Acrylic caulk, a versatile choice, offers flexibility and adhesion, making it suitable for various materials and environmental conditions. Understanding the distinct characteristics of each type of caulk enables homeowners and professionals to make informed decisions based on their specific cabinet door requirements.
Considerations for Caulking in Paramus, NJ
When caulking cabinet doors in Paramus, NJ, it’s essential to consider the local climate and environmental factors, selecting a caulk that can withstand temperature variations and moisture levels prevalent in the region.
Paramus experiences a humid subtropical climate with hot summers and cold winters. This means that the caulk used on cabinet doors needs to be able to endure temperature fluctuations without cracking or losing its seal. The moisture levels, especially during rainy seasons, also play a crucial role in caulk selection. Opting for a high-quality, moisture-resistant caulk will ensure that the cabinet doors remain effectively sealed, preventing drafts and moisture from seeping in.
Along with the climate, the environmental conditions in Paramus, such as exposure to sunlight and air pollutants, should be taken into account when choosing the appropriate caulk for cabinet doors. UV-resistant caulk can help maintain its integrity when exposed to sunlight, while accounting for air quality can lead to selecting a caulk with excellent durability and resistance against pollutants.
Preparation and Precautions
Properly prepping the cabinet doors and protecting surrounding surfaces are crucial steps before caulking and painting, involving tasks such as sanding, cleaning, and using protective materials to ensure a smooth and controlled painting process.
Before starting the sanding process, it’s essential to remove the cabinet doors and lay them out on a flat, stable surface. Ensure the area is well-ventilated and use a mask to avoid inhaling dust particles. Begin by gently sanding the doors with fine-grit sandpaper to remove any existing varnish or paint. The surface should be smooth and free from imperfections to achieve a professional finish.
After sanding, cleaning the cabinet doors is crucial. Use a mild detergent solution and a clean cloth to remove any dust, grease, or residues. Allow the doors to dry completely before proceeding to the next step. This ensures that the paint adheres properly and results in a durable finish.
Once the doors are sanded and cleaned, it’s important to protect surrounding surfaces from paint drips and spills. Cover the adjacent areas with drop cloths or plastic sheeting to prevent any accidental damage. Taping off the edges of the cabinets with painter’s tape will provide clean lines and a professional look.
Prepping the Cabinet Doors
Preparing the cabinet doors involves thorough sanding to create a smooth and even surface, removing any existing finish or imperfections that may affect the caulking and painting process.
This essential step ensures that the wood is properly prepped for painting or staining, and allows for a more even and professional-looking finish.
Start by removing the cabinet doors and laying them flat in a well-ventilated area. Use a medium-grit sandpaper to gently sand the entire surface, working in the direction of the wood grain. Pay special attention to any rough spots or areas with old varnish or paint.
Once the surface is uniform, switch to a fine-grit sandpaper for a finer finish, ensuring that all imperfections are smoothed out.
Protecting Surrounding Surfaces
Safeguarding surrounding surfaces from caulking and paint spills involves using protective materials such as tape, drop cloths, and masking products to prevent unintended marks or damage during the painting process.
Applying painter’s tape along the edges of the cabinet doors ensures a clean, crisp border where the caulking and paint meet. Laying down drop cloths or plastic sheeting beneath the workspace prevents any accidental drips from reaching the floor or other surfaces. When precision is crucial, utilizing specialized masking products helps to create defined lines and shield adjacent areas from overspray.
Techniques for Caulking Cabinet Doors
Mastering the art of caulking cabinet doors requires precise application techniques, including the use of caulking guns, smoothing tools, and meticulous attention to detail to achieve seamless and professional results.
Before beginning the caulking process, it is crucial to prepare the cabinet doors by thoroughly cleaning them to ensure the adherence of the caulk. The choice of caulk is also essential – for cabinet doors, a paintable, waterproof caulk is recommended to prevent moisture damage.
When applying the caulking, it is important to maintain a steady hand and use the caulking gun to dispense an even bead along the seams of the cabinet doors. After applying the caulk, using a smoothing tool such as a plastic putty knife or a wet finger can help create a seamless finish without excess caulk.
Allow the caulk to cure completely before further handling the cabinet doors, ensuring the longevity of the caulking and the professional appearance of the finished cabinetry.
Step-by-Step Guide to Caulking
A step-by-step guide to caulking cabinet doors involves tasks such as surface preparation, application methods, and drying times, ensuring a comprehensive and effective process for achieving professional results.
Before starting the caulking process, it’s crucial to prepare the cabinet doors by thoroughly cleaning the surfaces with a mild detergent to remove any dirt, grease, or debris. Once cleaned, allow the surfaces to dry completely. Next, inspect the cabinet doors for any gaps, cracks, or areas that need caulking, and make sure to fill any holes or repair any damage prior to caulking.
Regarding application, load the caulking gun with high-quality caulking and apply a smooth, consistent bead along the seams and edges of the cabinet doors, ensuring full coverage. Use a damp cloth or sponge to gently smooth the caulking to achieve a clean finish.
After applying the caulking, allow sufficient drying time as per the manufacturer’s instructions. Typically, it may take 24 hours or longer for the caulking to fully cure. Avoid touching or using the cabinet doors during this drying period to prevent any damage to the freshly applied caulking.
Painting Cabinets after Caulking
Following proper caulking, painting cabinets involves selecting high-quality paints and finishes, such as durable oil-based primers and white oil paint, to achieve a long-lasting and visually appealing result for cabinet doors.
To begin, it’s essential to ensure that the cabinets are clean and free of any dust or debris. Sanding the cabinets lightly will help the paint adhere better. After that, it’s crucial to apply the primer evenly to create a smooth base for the paint.
When selecting the paint, consider using semi-gloss or satin finishes for their durability and easy cleaning. Using a quality brush or roller can make a significant difference in achieving a professional-looking finish. It’s recommended to apply multiple thin coats rather than one thick coat for a smoother appearance. Allow sufficient drying time between coats to achieve an impeccable result.
Best Practices for Painting Over Caulk
Implementing best practices for painting over caulk involves techniques such as using a foam roller for smooth application, wiping with a damp cloth for excess caulk, and achieving consistent coverage across the cabinet doors.
When painting over caulk, it is essential to begin by preparing the surface. Start by thoroughly cleaning the area to remove any dirt, dust, or grease. Next, carefully inspect the caulk for any signs of deterioration or damage. It’s crucial to apply a high-quality primer before painting to promote adhesion and create a smooth base for the paint.
Once the primer has dried, you can start applying the paint. Using a foam roller will help achieve a smooth and even application over the caulk. Remember to maintain a consistent pressure on the roller to ensure that the paint spreads evenly. When painting around the caulked areas, use long, even strokes for a professional finish.
Recommended Paints and Finishes
Selecting recommended paints and finishes for cabinet painting involves reputable options such as Benjamin Moore and Sherwin Williams, offering durable and high-quality products for enhancing the visual appeal and longevity of cabinet doors.
Regarding choosing the right paint and finish for cabinets, it’s essential to consider factors such as durability, ease of application, and overall aesthetic appeal. Both Benjamin Moore and Sherwin Williams are trusted brands renowned for their wide range of paints specifically formulated for cabinets.
Whether you opt for Benjamin Moore’s Advance Interior Paint or Sherwin Williams’ ProClassic Waterborne Interior Acrylic Enamel, you can expect exceptional coverage, smooth finish, and excellent adhesion to wood surfaces.
For finishes, reputable options like Benjamin Moore’s Satin Impervo and Sherwin Williams’ Emerald Urethane Trim Enamel are highly recommended. These finishes offer superior durability, moisture resistance, and a luxurious sheen, making them ideal for cabinet doors that are frequently used and require easy maintenance.
Professional Caulking Services in Paramus, NJ
For professional caulking services in Paramus, NJ, homeowners can rely on trusted providers such as Original Design Painting and Home Advisor, offering expertise in preparing and finishing cabinet doors with precision and quality.
Original Design Painting has a team of skilled professionals with extensive experience in caulking and is known for their attention to detail and commitment to customer satisfaction. They utilize high-quality materials and advanced techniques to ensure that the caulking services they provide are durable and long-lasting.
Home Advisor, on the other hand, has been serving the residents of Paramus, NJ, with their exceptional caulking expertise, achieving a reputation for reliability and excellence. Their dedicated team understands the importance of proper caulking for maintaining the integrity and aesthetics of homes, and they deliver meticulous workmanship in every project.
Local Caulking Service Providers
Paramus, NJ residents can access reputable local caulking service providers such as Duke Painting and CMV Painting, delivering tailored solutions and exceptional craftsmanship for cabinet doors and other painting needs.
These providers are known for their expertise in caulking techniques, ensuring seamless and long-lasting results. Residents can rely on their attention to detail and use of high-quality materials to protect surfaces from moisture and damage.
Whether it’s interior or exterior caulking, they have the knowledge and experience to tackle diverse projects with precision.
Customer Reviews and Testimonials
Exploring customer reviews and testimonials in Paramus, NJ can provide valuable insights into the quality and satisfaction levels offered by professional caulking services for cabinet doors, aiding in well-considered choices.
These reviews often highlight the strengths and weaknesses of the service, offering a glimpse into the reliability, workmanship, and attention to detail of the caulkers.
Customer testimonials act as a crucial resource for potential customers, helping them gauge the reputation and credibility of the caulking service. By analyzing the experiences shared by others, individuals can determine whether the service aligns with their specific needs and expectations. Moreover, positive feedback from previous clients can instill confidence in the professionalism and capability of the caulking company in Paramus, NJ, while negative reviews serve as crucial warnings for potential pitfalls.
Conclusion and Final Tips
Engaging professional caulking and painting services in Paramus, NJ offers homeowners the opportunity to revitalize their cabinet doors with precision, expertise, and durable finishes, enhancing the overall aesthetic and value of their homes.
Professional caulking and painting services in Paramus, NJ can provide a multitude of benefits for homeowners. By entrusting the task to skilled professionals, homeowners can expect meticulously applied caulking that ensures a seamless, water-tight seal, preventing moisture intrusion and prolonging the lifespan of cabinet doors and other surfaces.
The expertise of professionals in selecting the right paint colors and types can greatly enhance the aesthetic appeal of the home while protecting it from environmental elements.
Engaging professional services ensures that the project is completed efficiently, saving homeowners valuable time and effort. Professional caulkers and painters are also well-versed in utilizing the latest techniques and high-quality materials, resulting in long-lasting, durable finishes that withstand wear and tear, ultimately adding value to the property. Professional services often come with guarantees or warranties, providing homeowners with peace of mind and assurance of satisfaction and quality craftsmanship.
Benefits of Professional Caulking and Painting
Engaging professional caulking and painting services in Paramus, NJ offers homeowners numerous benefits, including superior finishes, extended durability, and enhanced property value, contributing to long-term satisfaction and aesthetic appeal.
Professionally executed caulking and painting not only ensure a smooth and flawless finish, but also provide a protective barrier against moisture, dust, and other environmental factors, ultimately leading to extended durability of the surfaces.
These services add significant value to the property, making it more appealing to potential buyers and increasing its overall market worth. By leveraging the expertise of professionals in Paramus, NJ, homeowners can enjoy a beautiful, long-lasting transformation for their living spaces.
Frequently Asked Questions
1. How important is it to caulk cabinet doors before painting in Paramus, NJ?
Caulking cabinet doors before painting is crucial for a professional and long-lasting finish. It helps seal any gaps or cracks, providing a smooth and seamless surface for the paint to adhere to.
2. Can I skip caulking my cabinet doors before painting in Paramus, NJ?
It is not recommended to skip caulking your cabinet doors before painting. It will not only affect the appearance of the final result, but it can also lead to paint chipping and peeling over time.
3. What type of caulk should I use for caulking cabinet doors in Paramus, NJ?
For cabinet doors, it is best to use a paintable caulk that is recommended for interior use. Silicone or acrylic-based caulks are popular options that are easily available in most home improvement stores.
4. Do I need to remove the old caulk before applying a new one for my cabinet doors in Paramus, NJ?
It is recommended to remove the old caulk before applying a new one. This will ensure a clean and even surface for the new caulk to adhere to, providing a better seal.
5. How long does the caulk need to dry before painting my cabinet doors in Paramus, NJ?
The drying time for caulk varies depending on the brand and type used. However, it is safe to wait at least 24 hours before painting to ensure the caulk has fully cured.
6. Can I paint over the caulk used for caulking my cabinet doors in Paramus, NJ?
Yes, you can paint over the caulk used for caulking your cabinet doors in Paramus, NJ. Make sure to use a paintable caulk, and wait for it to fully dry before painting.